1 EBIThree.com 2 Clarify Instructions 3 Instructions to Synchronize Clarify Project to SVN Repository

Step by Step Instructions to Synchronize Cleo Project to SVN Repository
Below we walk thru the steps to Synchronize Cleo Projects/Packages/Objects with the SVN Repository. These steps are ideal after updates have been made in the EBI Workbench.
1 - Identifying Changes Made in Cleo Workbench
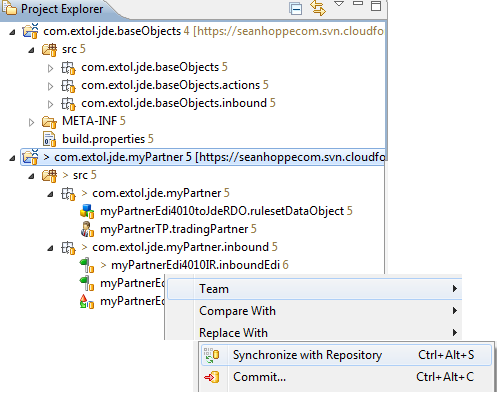
If an EBI user has made changes to their projects in their workspace and it is connected to their SVN, a greater than sign (>) will appear next to the project along with a Revision number.
In this case we made updates to myPartnerEdi4010IR.inboundEdi and myPartnerEdi4010Inbound850IR.inboundEdi

2 - Synchronize Updates with SVN Repository
From the Clarify Workbench, Clarify users can synchronize these changes to the SVN by right clicking the project: Team > Synchronize with Repository.

3 - Team Synchronizing
When the Clarify user selects Synchronize with Repository, the Clarify studio will switch the user to the Team Synchronizing section.

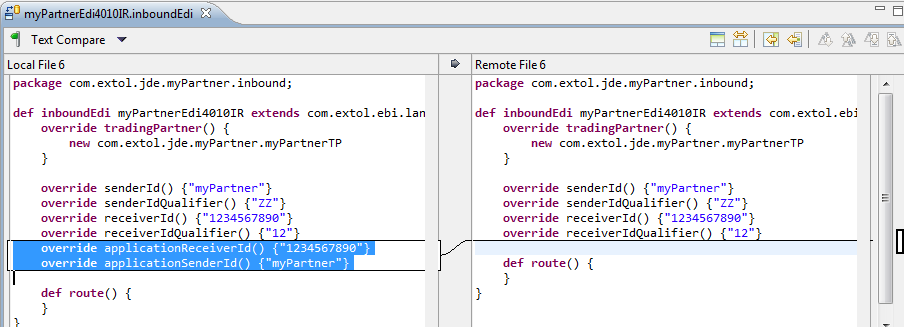
Once there the Clarify user can click on the object that has differences from the SVN Repository object.

When double-clicked a Text Compare box will appear to the right showing the EBI user the difference between the Clarify user’s Workspace object and the SVN’s object.

4 - Commit Outgoing Changes to SVN
If the Cleo Clarify user wants to make this change to the Repository they can click the Commit All Outgoing Changes button at the top of the Studio.

If the Clarify user wants to make this change to the Repository they can click the Commit All Outgoing Changes button at the top of the Studio.
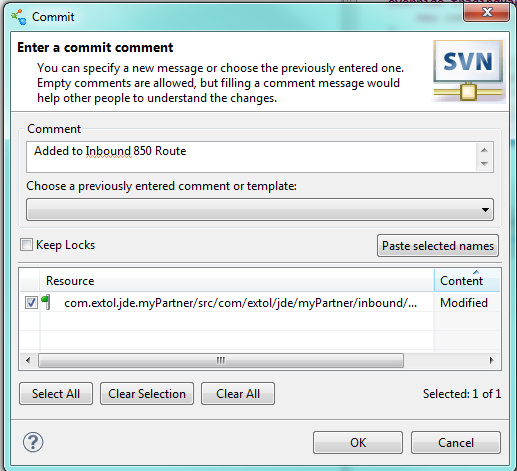
A commit box will appear asking for a comment and showing what objects are being changed. In this example an inbound myPartner 850 route was modified.
Click OK when finished.

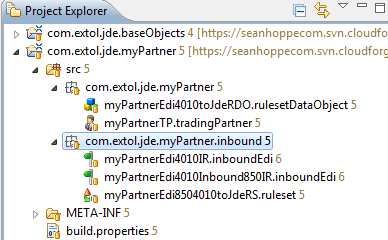
When the box disappears the objects in the workspace will lose their > signs and their Revision numbers will increase showing the change has been made.

By: Sean Hoppe on
