1 EBIThree.com 2 Clarify Instructions 3 Instructions for Search/Replace Capabilities in Cleo Clarify 3

Search/Replace Capabilities in Cleo Clarify Studio
The Cleo Clarify Studio Workspace is designed to have Clarify created objects separated into Projects. Within these projects are packages and inside those packages are the Cleo Clarify user created objects.
A best practice for the workspace set-up is having a Base Project and then multiple Trading Partner Projects.
Search - STEP 1
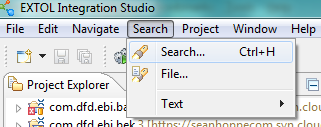
Click Search>Search
Search - STEP 2
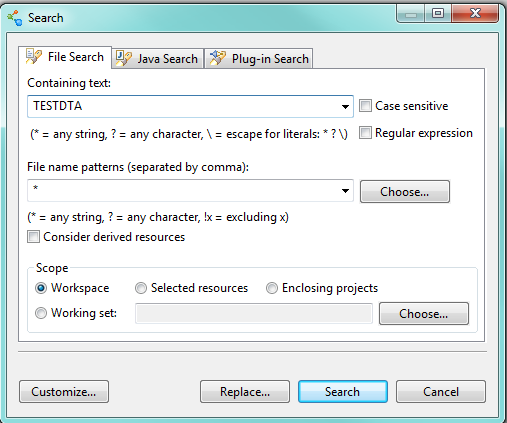
In the containing text field the Cleo Clarify user places the text that the user would like to search for throughout all the Open Projects in the workspace. In this example, the Cleo Clarify user is searching for TESTDTA.
Search - STEP 3
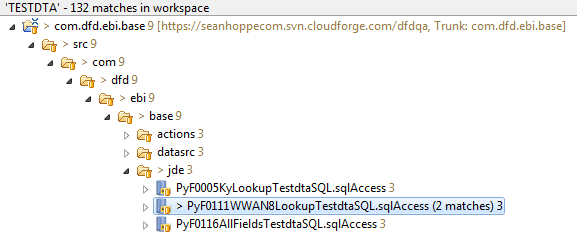
A search results box will pop up near the bottom with how many matches were found. It will also show the Clarify user where in each project that text is located. If you open the Text Editor for that object it will highlight the text the Clarify user searched for in blue.
Replace - STEP 1
Click Search>Search

Replace - STEP 2
In the containing text field the Clarify user places the text that the user would like to replace. Once entered click on the Replace button at the bottom.

Replace - STEP 3
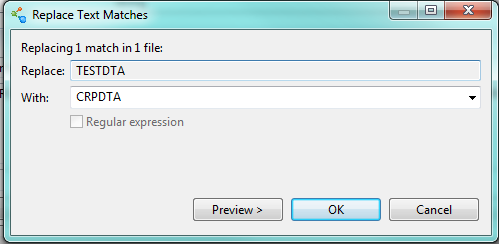
In the example given, the Cleo Clarify user will be replacing TESTDTA with CRPDTA. Once entered click Ok or Preview if you want to go into further detail.
Replace - STEP 4
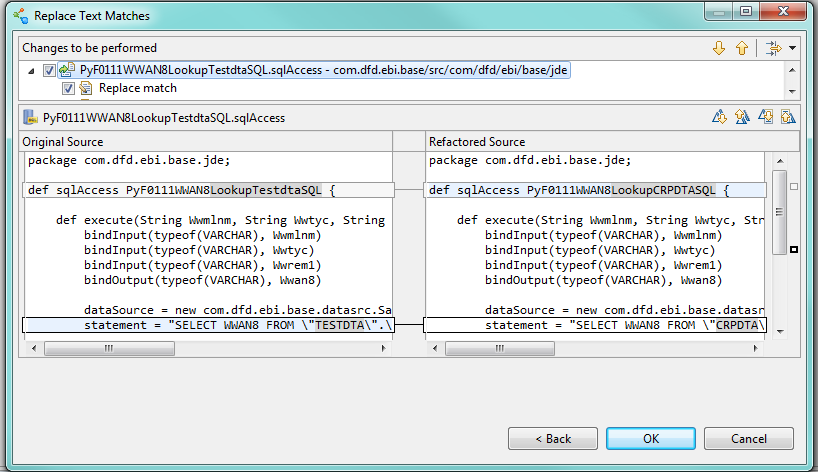
In the example, if the Cleo Clarify user clicked Preview it would list all the matches that would replace TESTDTA with CRPDTA. The Clarify user is able to select the object and it will show the user the before and after. If the Clarify user does not like the change, the user can just u ncheck the box to take that object off the replaces to be performed.
By: Sean Hoppe on
