1 EBIThree.com 2 Clarify Instructions 3 Instructionsto Update Server Projects After Installed and Deployed
Step by Step Instructions to Update Server Projects After Installed and Deployed
Below we learn how to update existing Clarify server projects already deployed and installed on the Cleo Clarify Server.
This process is a 2 step process- 1. Update Production Tag and create new tag to include updated objects
- 2. Re-Deploy projects to Clarify Server
Step 1 - Updating Trunk and Production Tags
For changes to Production objects the Clarify user will want to do this in their workspace that is connected to the trunk.
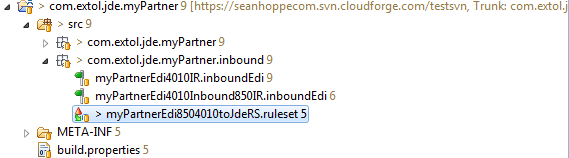
For this example the Clarify user has made a change to a Ruleset that is up and running on production.
First step the Clarify user would want to perform is to synchronize their workspace with the trunk. on their SVN Repository.
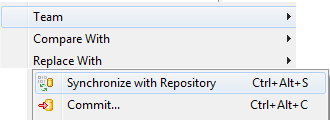
After the trunk is Synchronized with Repository, the Clarify user will want to re-tag the project for Production. An example of this process is done in: Create Tags for Projects in SVN Repository.
Step 2 - Creating New Tag
After the Clarify user updates the Production Tag, they will want to create a Tag for the update to the Production tag. This tag represents a snapshot in time of Production. If need be, users can backtrack to this point at a later time.
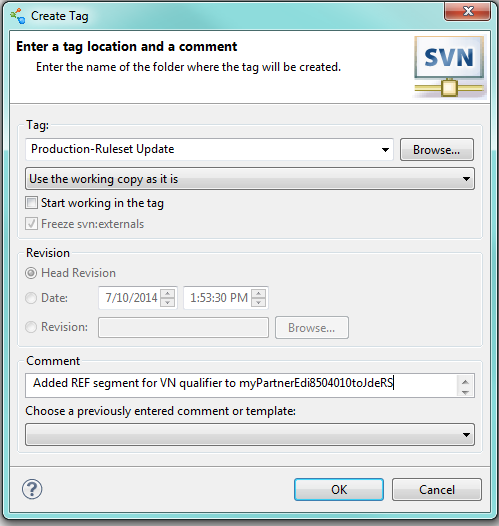
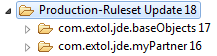
Below is the example of the newly created tag we just created. Rememeber, this tag does NOT substitute for tagging production. This tag is an additional tag
Show History of Tagged Project
When the Clarify user clicks OK. A progress bar will appear and then the new tag will appear under Tags on the SVN Repository. If the Clarify user right clicks the tag and selects Show History at the bottom of the screen in the History tab will show what changes were made.
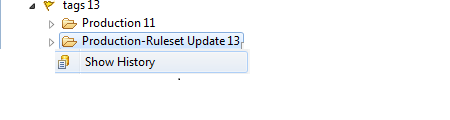

Show History of Tagged Project
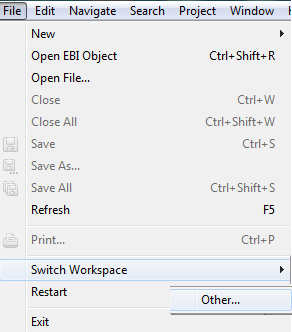
At this point, the Clarify user will start the process to promote the updates to the Production server. First the user will want to switch workspaces to a new workspace for the Production Update.

Once created the Clarify user will want to check out the Production-Ruleset Update tag to their workspace.
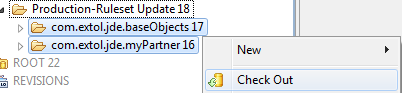
After the Tagged Production Projects are checked out, we will see them in the Workbench's Project Explorer.

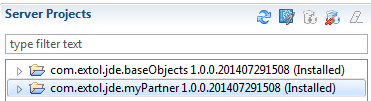
Next the Clarify user will want to connect to the Production server. Once connected the Clarify user will need to drag the updated projects over to the Server Projects. Once deployed the Clarify user can click the Install all deployed project(s).
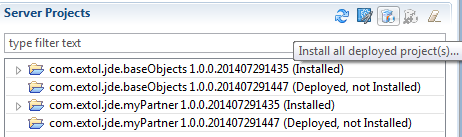
Once the Clarify user selects that the updated projects will override the old projects on the Production server. At this point the project deploy/install are done.
By: Sean Hoppe on