1 EBIThree.com 2 Clarify Instructions 3 Instructions to Create REST Webservices Provider in less than 15 minutes

Create REST Webservices Provider in less than 15 Minutes
This basic set-up walks users thru set-up in Clarify's workbench and testing on the local server.
Step 1 - Create New Project
The first step the Clarify user needs to take is creating a new Clarify Project.
File > New > EBI Project

Step 2 - Select Webservice Provider Wizard
We will then be prompted to select an EBI Wizard. We will type in ‘web’ to hone in on Web Service Provider.
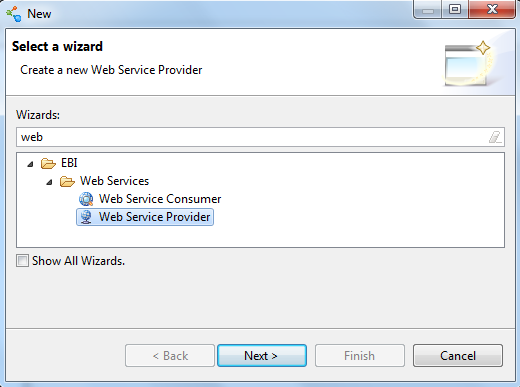
Step 3 - Create Webservice Project
The next step the Clarify user needs to take is naming the new project. In this case we will be returning the Business Process Script Process ID. We will name our project. com.shg.RetrieveProcessID.
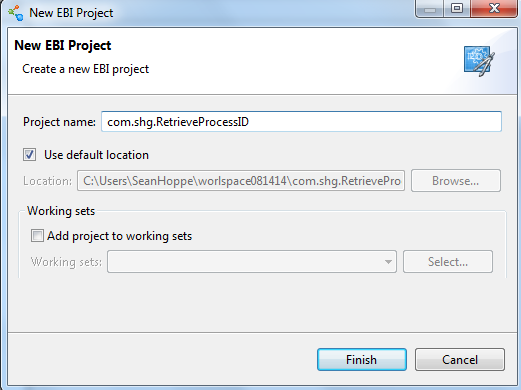
Step 4 - Add Webservice Package
Once the Webservice project has been created we will want to create the actual REST Webservice Package. When we create the Webservice Package, the Cleo Wizard will create the actual webservice object and the corresponding Business Process
We will RIGHT CLICK on the package: com.shg.RetrieveProcessID and choose
New > Other

Once we choose “Other” we will be prompted to determine which type of Webservice Provider we want to create. In our case we will choose REST.
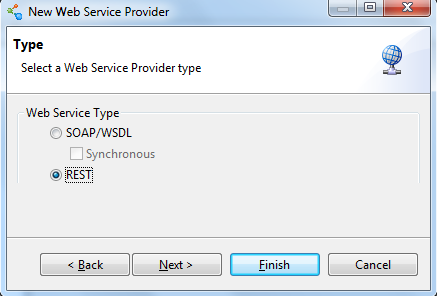
After we click on Next, we will be asked to name our new REST Webservice (WSP). The default value is: MyWsProviderWSP.wsProvider. We will rename the WSP to: ReturnProcessIdWSP.wsProvider (see below)
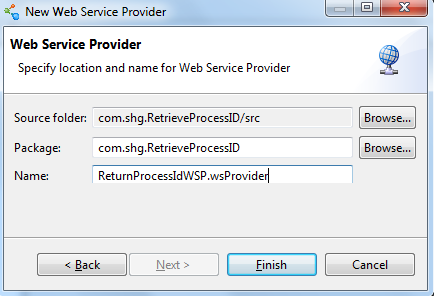
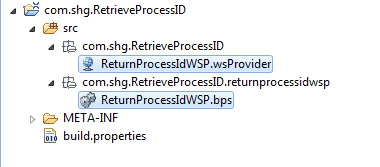
Once we click Finish, we should see the follow project, packages and objects in the EXTOL Workbench
Step 5 - Update Webservice Business Process
After the REST Webservice package and objects are created in the Cleo Workbench, we will want to update the Business Process. Double-click on the object: ReturnProcessIdWSP.bps. Once opened, we should see the following:

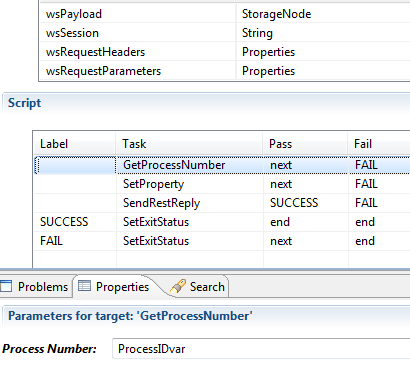
We will want to add two new tasks and place them in the following order:
- GetProcessNumber
- SetProperty
Step 5.1 - BPS Task: GetProcessNumber
In the example below, we assign the variable ProcessIDvar to “Process Number”.
Step 5.2 - BPS Task: SetProperty
Below we assign wsReplyHeaders to “Properties File”, create a constant of ProcessID for “PropertyName”, and assign the variable ProcessIDvar, from above, to “Value”.

The SetProperty task essentially returns the Business Script Process ID Number as a header variable named: “ProcessID”
Step 6 - Local Server: Move Project to Selected Scenario
Once the Business Process has been finalized we can choose the Admin Console. From the Admin Console we will look to test our REST Webservice Project on the local server.
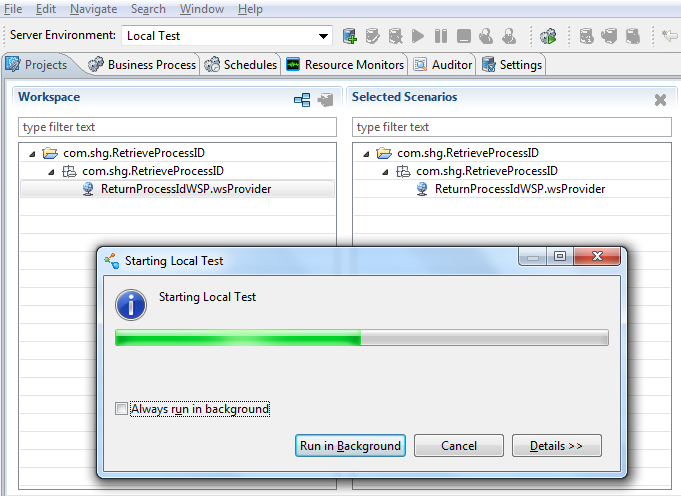
Below we will drag the object ReturnProcessIdWSP.wsProvider to the Selected Scenarios Pane.

Step 7 - Local Server: Start Server
After the Project is located in the Selected Scenarios Pane, we will start the Local Server.
Step 8 - Activate Resource Monitor
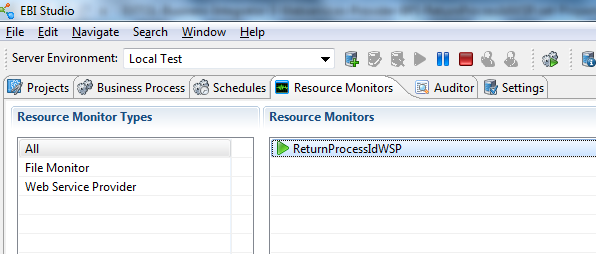
With the Local Server active, we will proceed to goto the Resource Monitors tab. From here we will locate the newly created WebService Provider and turn it on.
Step 9 - Determine URL of REST Webservice
On the same screen where we active the Resource Monitor of the Web Service Provider, we can review the Internal Service URL and Internal SSL Service URL.
With either of these two URLs, a web browser on the same network/domain would be able to access this webservice.
- http://localhost:8081/ReturnProcessIdWSPRest
- https://localhost:8443/ReturnProcessIdWSPRest
Note: Replace ‘localhost’ with the current machine’s IP address/host name

Step 10 - Testing REST Webservice Provider
We show how to test this Webservice without creating a Clarify REST Consumer Webservice. Check out our post on Use Firefox’s Firebug Addon to Debug Clarify Webservices.
By: Sean Hoppe on
