1 EBIThree.com 2 Clarify Instructions 3 Instructions to Create Outbound x12 EDI 850 Project

Step by Step Instructions to Create Outbound x12 EDI 850 Project
In the steps below we will discuss each of the required Cleo Clarify objects needed to successfully process an outbound EDI Document. I consider this to be a good 'cheat sheet' to help acclimate new/existing Clarify users to the new object requirements. These same steps can be used for outbound EDIFACT documents too.
In our Step-by-Step instructions to translate inbound 850 EDI x12 document to database tables we reviewed the creation of Data Source, Database Adapters, and Database Schema. In these instructions we will review the Database Wizard.
- B2B Solution: Cleo Clarify
- Source: Database
- Target: EDI
Note:It is advisable to use global variables in each of the objects where there a file location is referenced. Ie. Data Source.
Post Set-up - Outbound x12 EDI 850 Project
Once this project is set-up in the workspace, review the following post set-up steps:
- Instructions: Step by Step to Propagate Clarify Objects into Projects/Packages
- Instructions: Step by Step to Test Clarify Outbound Database->850 Project in Studio Admin Console
- Step 1 - Database Wizard

- Step 1.1 - Create DataSource

- Step 1.2 - Create Database Adapter

- Step 1.3 - Create Database Schema (Source)

- Step 2 - Create Data Analysis Ruleset

- Step 3 - Create Business Process Launcher

- Step 4 - Create x12 Schema (Target)

- Step 5 - Create Ruleset

- Step 5.1 - Create Ruleset Data Object (RDO)

- Step 5.2 - Create SQL Access -- optional

- Step 5.3 - Create Formula -- optional

- Step 6 - Create Trading Partner

- Step 7 - Create Outbound Business Process Script

- Step 8 - Create Outbound EDI Route

- Step 9 - Create File Write Adapter

- Step 10 - Create Outbound Write Business Process

- Step 11 - Create Control Number Generators

- Step 12 - Create EDI Enveloper

Database Wizard
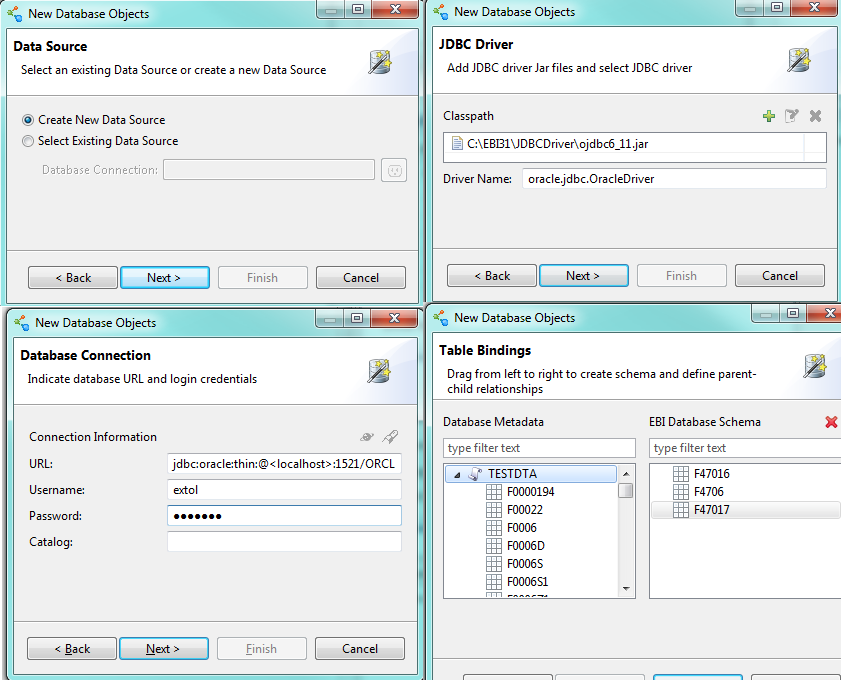
The wizard will use an existing Data Source and create a Database Adapter and Database Schema for Cleo Clarify users.
File > New > Database Wizard
Create Data Source
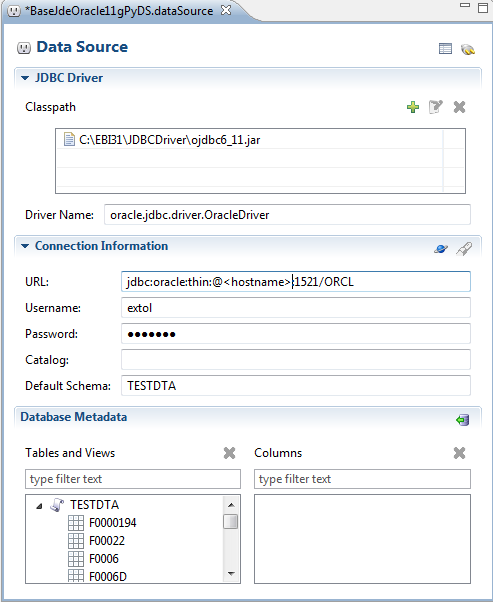
The wizard will create this object for Clarify users. In our example, the Data Source already existed. This object is what will connect to the Data Source using a JDBC Driver and the credentials to connect to the Database.
File > New > Data Source
Create Database Adapter
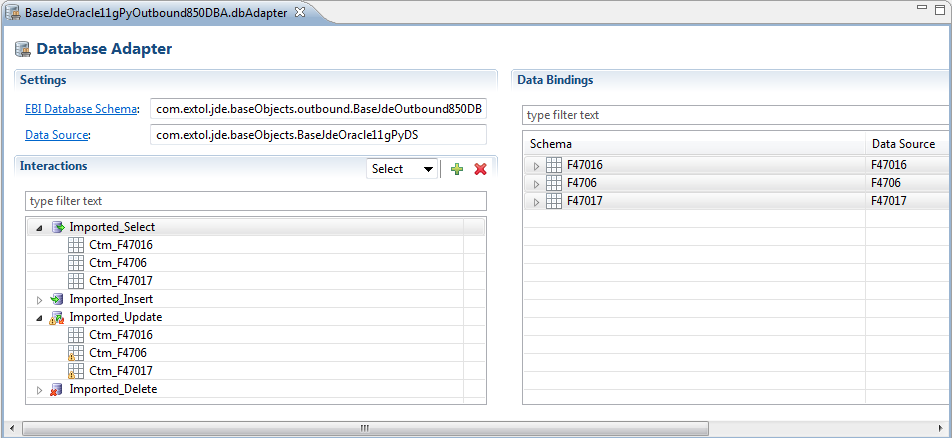
The wizard will create this for EBI users. This object allows EXTOL to select the data in the Database and update the records as processed. We are selecting where SYEDSP is blank in this example.
File > New > Database Adapter
Create Database Schema (Source)
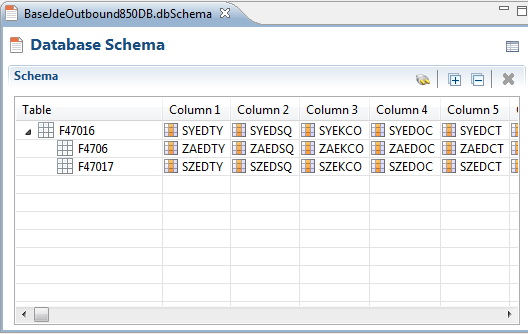
The wizard will create the Database Schema for Clarify users. The Database will be used as the source schema in our Ruleset.
File > New > Database Schema
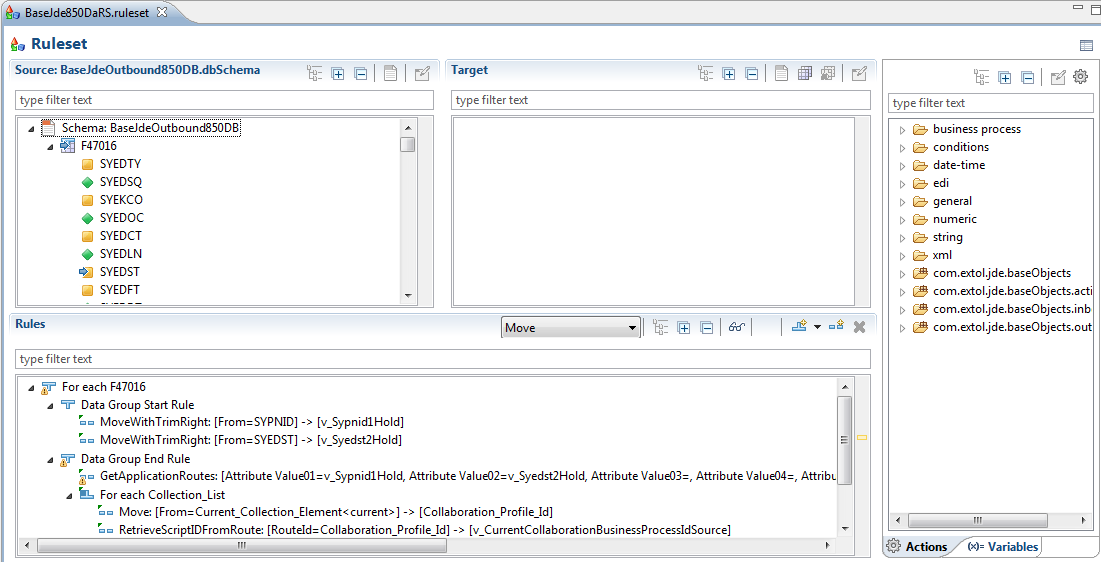
Create Data Analysis Ruleset
Once the Source Schema is created Clarify users can create your Data Analysis Ruleset. This object is placed in the Launcher Business Process and reads the defined database record/fields to determine the outbound routing..
File > New > Ruleset
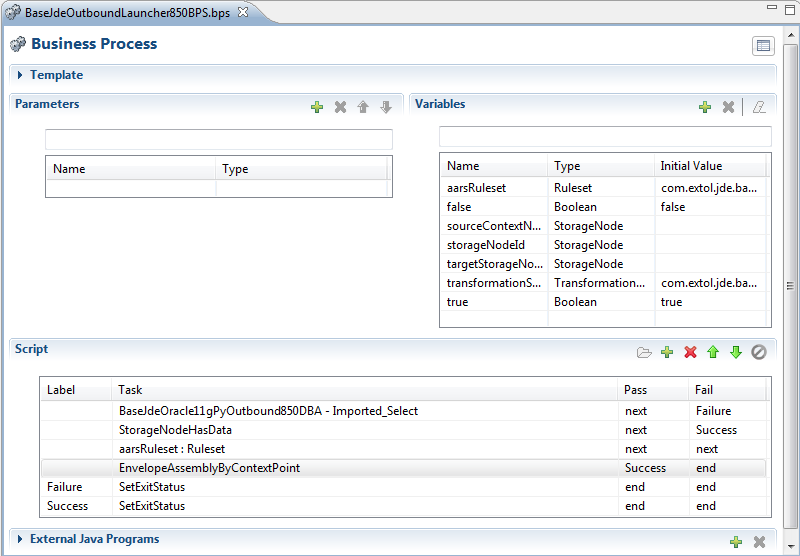
Create Business Process Launcher
This Business Process is what kicks off the Outbound Process and where the Data Analysis Ruleset is placed.
File > New > Business Process
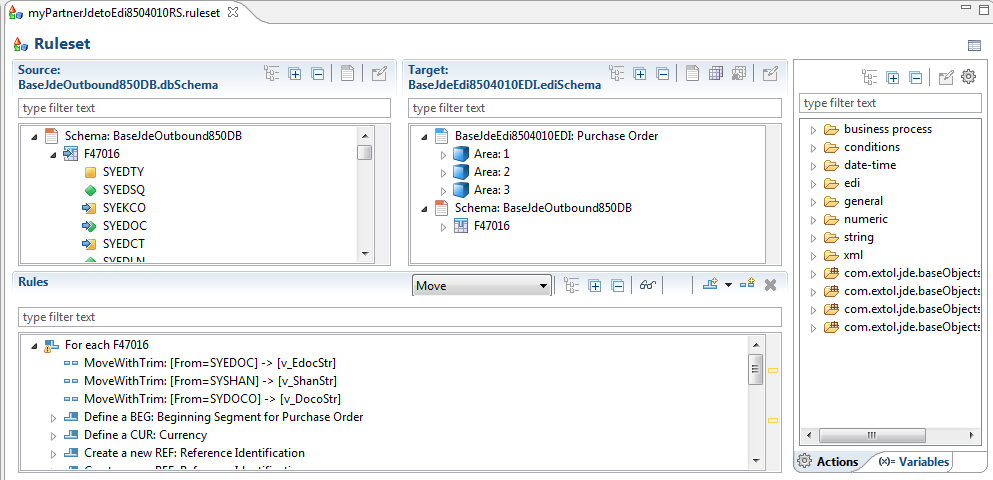
Create Ruleset
Once both schemas are created we can create our Ruleset. This Ruleset will select data from a Database and transform the data into an EDI document.
File > New > Ruleset
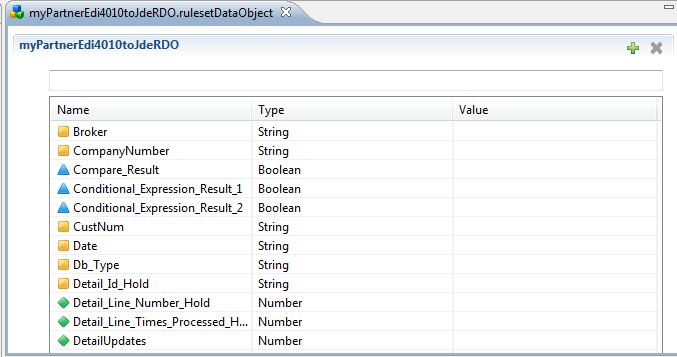
Create Ruleset Data Object (RDO)
Ruleset Data Object (RDO) is to define variables that are utilized by one or more Clarify Rulesets.
File > New > Ruleset Data Object
Create SQL Access -- optional
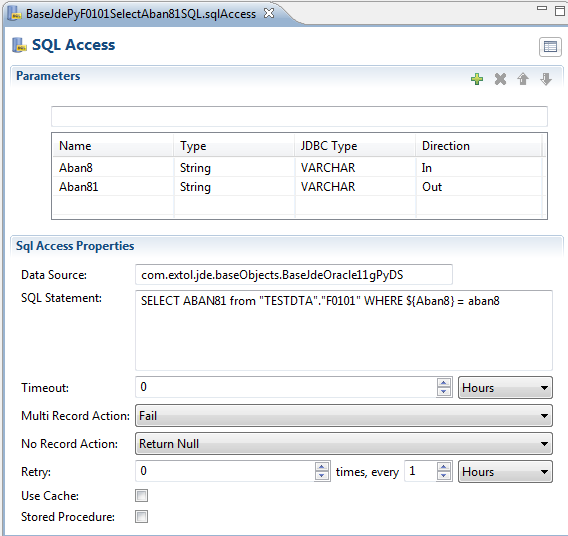
These are used in a Ruleset to go out to other Database tables with certain input values and return back specific fields. This example goes out to the F0101 table with ABAN8 and returns ABAN81.
File > New > SQL Access
Create Formula -- optional
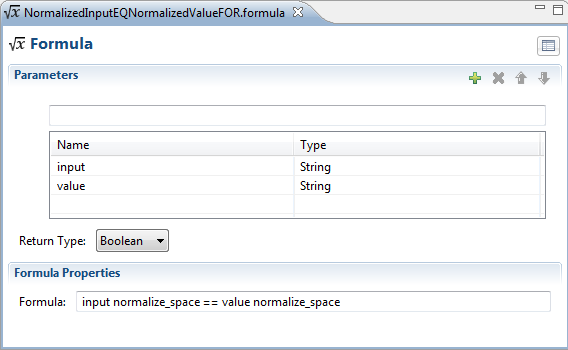
These are used in a Ruleset to set conditions on composite rules or simple rules. This example sees if a certain value equals another value.
File > New > Formulas
Create Trading Partner
This object acts as a pointer to help users indicate who their trading partners are in EBI.
File > New > Trading Partner

Create Outbound Business Process
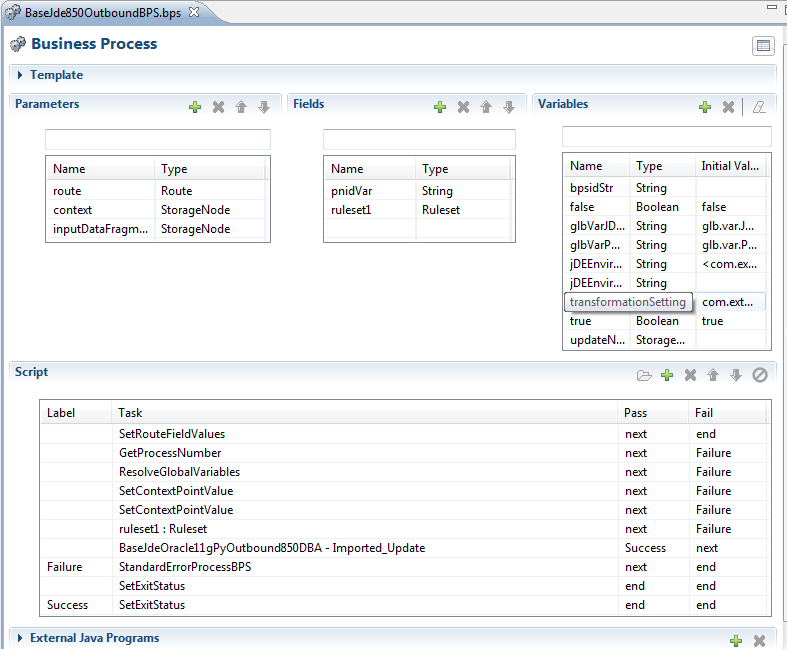
This object performs tasks on the data. In this example we have a Ruleset and Database Adapter to translate and update the data in the database.
File > New > Business Process
Create Outbound EDI Route
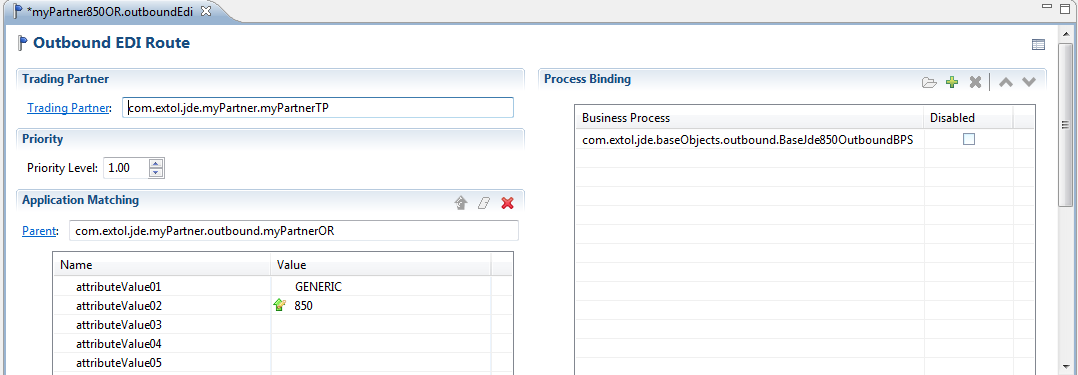
This object integrates with the Data Analysis Ruleset to determine how to properly route the outbound data. The Outbound EDI Route will kick-off the EBI Outbound Business Process. This example is searching for GENERIC in SYPNID and 850 in SYEDST. Note: Under ‘Process Bindings’ more than one Business Process Scripts can be executed.
File > New > Outbound EDI Route
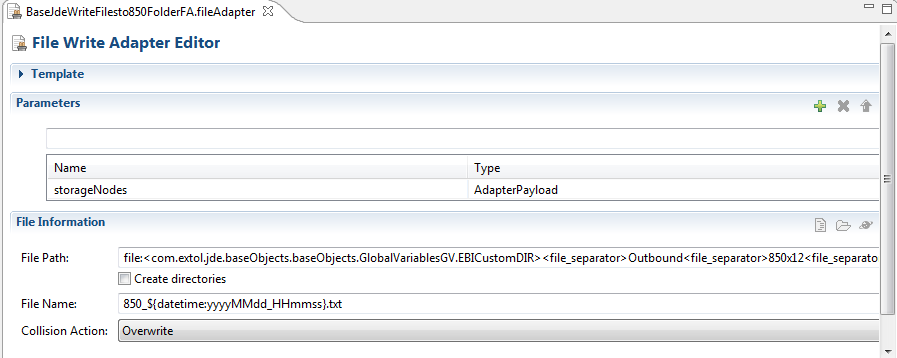
Create File Write Adapter
This object is used to write the data to a specific file path and create your data. In this example we are creating a .txt document for our EDI data. Note: the File Path implements global variables for path determination.
File > New > File Adapter
Create Outbound Write Business Process
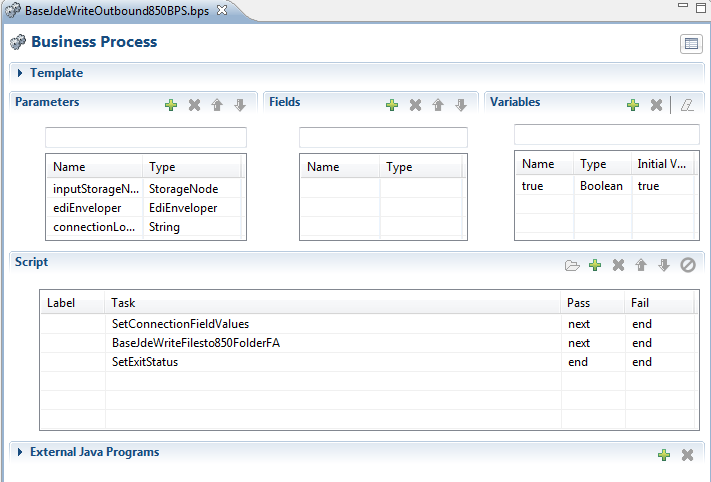
This Business Process writes out the x12 850 data once it has been generated. In this example we are using our File Write Adapter we just created. The Business Process can be generalized so we can use it for any outbound document; not just for the outbound x12 850.
File > New > Business Process
Create Contol Number Generators
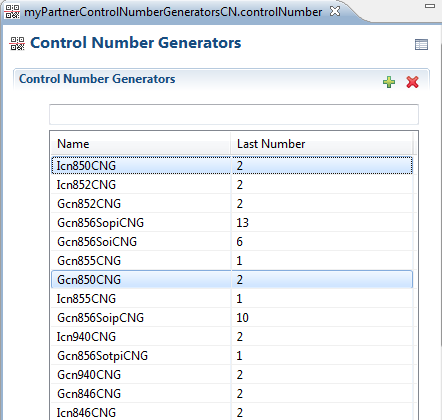
This Clarify object assigns sequential numbers to your trading partner’s interchanges and group control numbers.
File > New > Control Number Generators
Create EDI Enveloper
The EDI Enveloper will envelope the trading partner information. Once the data is enveloped, the object points to the Outbound Write Business Process and Control Number Generators. This object will launch the Business Process that will send the file to the trading partner; in this case, write out the file.
File > New > EDI Enveloper

By: Sean Hoppe on
