1 EBIThree.com 2 Clarify Instructions 3 Instructions to Create Branch for Trunk:Project in SVN Repository

Step by Step Instructions to Create Branch for Trunk:Project in SVN Repository
1 - Why is a Branch Needed?
Branches are used in SVN Repositories to mark a time when a major change is going to take place on the trunk. For this example the Clarify user will be changing an existing Inbound 850 EDI document process to include SDQ mapping in the ruleset.
First the Clarify user will want to update their workspace with the latest version of their projects from the SVN.
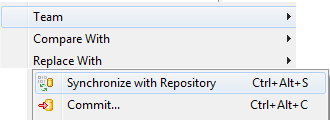
Right-click the projects and click Team > Synchronize with Repository
2 - SVN Repository
Once the Clarify user has synchronized they will want to click on the SVN Repository section at the top right of the Clarify studio.
From the Trunk, the Clarify user will right-click on the projects they would like to create a branch.
Click on New > Branch

3 - Creating a Branch
A create branch box will appear and allow the Clarify user to enter comment information for the branch.
For this example, the Clarify user is creating a branch because they want to update their myPartner Inbound 850 Ruleset to include SDQ mapping changes.
A date and time will automatically be assigned to the branch. When ready click OK.

4 - Branch Created
When the branch is created the Clarify user can see a new folder appear under branches that is labeled Updating 850 Ruleset. This is the branch that the Clarify user created when they began making changes to the myPartner project.

At the bottom of the studio, the Clarify user can click on the branch and see when the last time the branch was changed and by whom.

5 - Check-Out Branch
The Clarify user will want to create a new workspace to checkout their branch.

The workspace will look like this below. From here, users will be able to make the changes necessary to their objects. See Merging Branches on how to update the trunk with the changes made to the branch.

By: Sean Hoppe on